Showing posts with label instructions. Show all posts

Monday, November 24, 2014

Plus Size Babywearing


For years I never thought a thing about my size.  I was a size two going into college.  I danced (ballet ya’ll) six days a week.   I was a twig.  Then I slowly started gaining weight, and then I got married and had babies.  I went from twiggy to plus size in a matter of years.  When my precious little guy was born, I saw a Moby wrap and I thought, “I must have that.”   I quickly went from, “I must have that” to “…but I’m too fat” and “What will people see when they look at me, the fat mom with the tiny baby wrapped to herself?”  If you are a plus size mom, I bet you’ve had the same thoughts. 


The thing is  1) No, you aren’t too fat to babywear.   2)  Yes, the carriers will fit you.   3) People will see a mother who is wearing her baby, and a tiny baby they want to touch and ask a million questions about.  They are too enthralled by your ability to multi-task and by your beautiful child and how in love you are with your child to care about your body image.


Some things I’ve learned over the past four years of babywearing as a larger mom are this. 

  • Get a carrier with a pattern you love! 

Don’t buy a carrier with a dark color to try to hide your roundness or blend into your surroundings if what you really wanted was the carrier with the bright pink flowers or the one with the puppy dogs all over it.  Get something you really like and enjoy wearing it!  People will see the cute pattern and the baby anyhow.  If you are going to spend the money, get something lovely instead of the drab gray if you really hate gray.

  • Don’t buy the “plus size” without first trying it out. 

A standard size carrier, wrap, or sling is probably going to fit you.  I’m a size 22 with 40K breasts, and all the standard carriers fit me *with room to spare*.   Ring slings come long anyhow.  If you are also short as well as plus size, you’ll probably find the longer sling under your feet.   If you wear the standard size buckle carriers and mei tais properly (let’s put the waistband at our natural waist instead of our hips gals), you’ll probably be like me and have to roll up all that extra strap hanging down.  I found out the hard way that just because I am bigger doesn’t mean I need a size 7 or 8 wrap…waaaay too much fabric hanging down at my feet.  So, when you see that cute Ergo and then see it comes with “waist extenders”, please don’t automatically buy the plus size accessories.

  • Don’t buy a carrier without trying it first

Really, this could go for anyone, but don’t see something online or in your friend’s picture and just go buy it.  This may end up costing you a bundle in the end, and worse, will make you feel bad about babywearing and your body.  Everyone has different body shapes and what works for one person may be incredibly uncomfortable for someone else.  I’ve found some carriers have buckles that rub my arm fat horribly.  Some make my breasts contort into weird positions.  Wrapping was annoying to me because I can’t reach around my back with my short chubby arms.  However, other types had rings that I loved, and straps that didn’t rub, and easy ways of getting a baby on my back. Find a group with a lending library, like Babywearing Around Tulsa, and go to a meeting to try before you buy.  If you can’t make it to a meeting, at least borrow from another member or friend who owns what you are interested in and see if you like it first.  Meetings are nice because an expert can help you put it on correctly and be sure it fits you correctly. It’s better to be able to just set something back on a table than to have it bought and at home, where you can cry over it and get down on yourself for it not fitting well.  There’s something out there for everyone, but it may be trial and error to find the one for you!

  • Yes, you can breastfeed in a carrier!

If you aren’t breastfeeding, this doesn’t apply to you obviously, but many babywearing mamas are also breastfeeding mamas.  Many plus size mamas are plus size all around…hello big boobs!  Just because you are a larger size, doesn’t mean you can’t breastfeed in a carrier too.  It may take some practice though.  My advice is to start by finding a shirt you can lower and pull the breast out the top of vs trying to lift up a shirt in carrier.  Sports bras are my go-to nursing bras for this since they have no fabric impeding the lifting process on the top.  Find a carrier you can lower easily or turn baby a bit in too.  I liked that my ring sling tail covered the top half of my chest.  Ideally, find another mom who is or who has breastfed in the same carrier you have and get help!  If I hadn’t had a real-life, in-person tutorial, I may not have tried hard enough to figure it out.  Breastfeeding in a carrier is wonderful once you get it down though.  Large breasted mamas can breastfeed while babywearing! 

  • Be confident! 

Easier said than done, but be confident that you are a beautiful woman and a good mom.  This stage of your child’s life is gone in a flash, so have fun and enjoy snuggling 
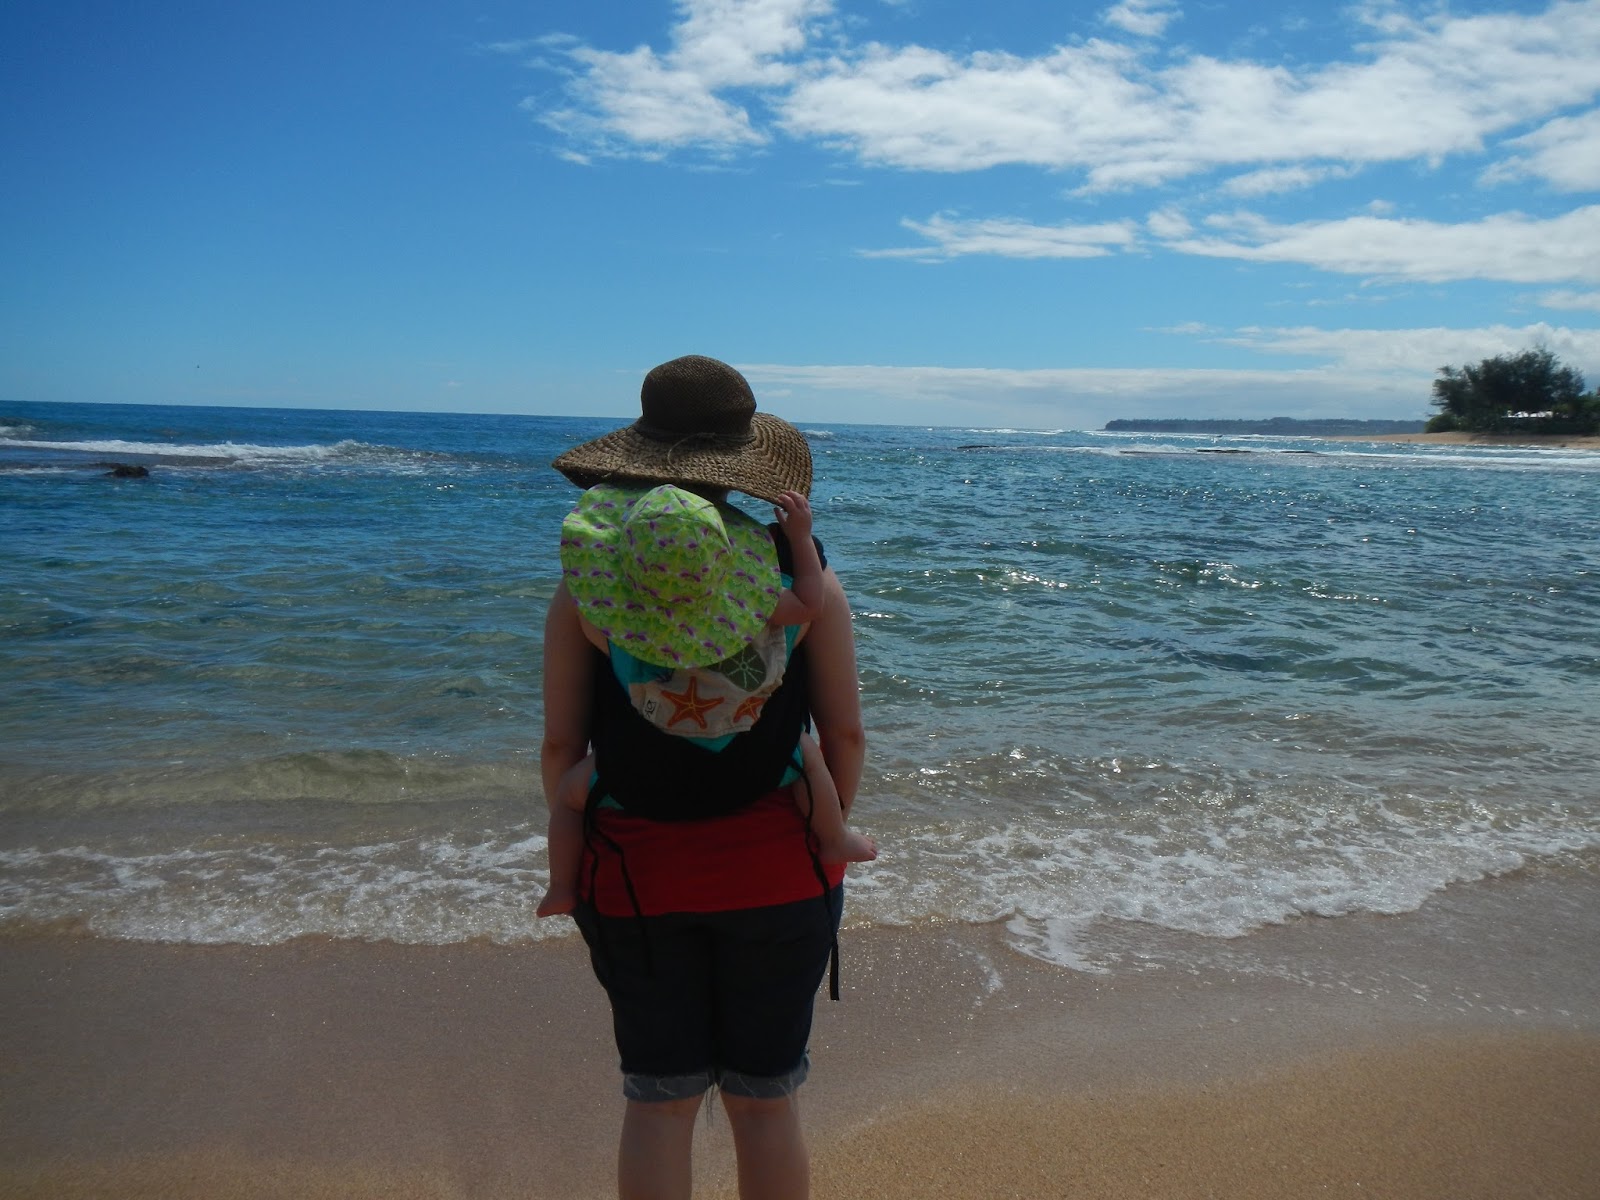
with your little one.  Here are some of my favorite babywearing pictures of this fluffy mama and my kiddos….with at least one in my pajamas.


My name is Kristin Riffe.  I’m married and have two little boys who keep me on my toes.  I used to teach elementary school, but recently decided to quit and start a small sewing business.  I would consider myself a partially “crunchy” mama, who is somehow both extroverted and a wallflower.   


Monday, September 22, 2014

I'm New and Lost


Welcome!

Are you new to babywearing?  Or maybe you still haven't found that perfect carrier for you or your child?  There's so many options that it can be a bit overwhelming.  

First what is babywearing?  Babywearing is using cloth to wear your baby or young infant.  This allows you to comfort your child while still being able to get things done, if you so choose hehe.  It ranges from essential for many parents to an art form.  And of course there is always a price range to normally accommodate all budgets.  

Are you semi local to Tulsa?  If not, feel free to email babyweartulsa@gmail.com and we will help point you to the closest group that we are aware of.  Okay so I'm a bit biased but Babywearing Around Tulsa (BWAT for short) is an excellent resource for you to take advantage of.  BWAT has two FREE meetings per month (monthly and mid-month) that cover safety as well as a brief 101 that showcases all the main options you have to wear your baby.  In addition to the free meetings, BWAT also offers small classes on specific topics for a small fee.  Fees go to benefit the group as well as the instructors gas and time.  Likewise private consultations can be done at the discretion of the instructors for an agreed upon price.  
Instructor Somer demoing a Front Wrap Cross Carry (FWCC) during Babywearing 101


But where do I start?  Come to a meeting!  Immerse yourself.  Babywearing (BW/BWing) 101 talks about airway safety, spine and hip development as well as comfort for the wearer.  It also goes over the 4 major categories of carriers: Woven Wraps, Mei Tais (pronounced "may ties"), Ring Slings (RS) and Stretchy Wraps (Moby, Boba, etc), as well as Soft Structured Carriers (SSCs) like Boba, Tula, Kinderpack, Ergo, etc.  A demo of a front carry in each carrier will be shown.  In addition to the educational aspect of the meeting, you'll be given approximately an hour to visit stations and even try on a carrier or two.  Will you walk out knowing which carrier is perfect for you, possibly.  More than likely you'll have a better idea of what you would like to try.

Trying on carriers is great, but I don't think I will know if it's the perfect carrier for me in just 5 minutes?  How right you are!  Only time wearing will really determine if that carrier is your ideal comfort for you and baby.  BWAT has another resource.  We call it a Lending Library.  

What is a Lending Library?  A Lending Library (LL) is basically a library of wraps and carriers for member check out (normally 2 weeks to a month).  A Lending Library is great though, as it allows members to actually see if carriers will work for them before they buy them. Our Lending Library is constantly growing and we are striving to obtain more variety. We'd love any carrier that you would like to donate or any amount that you are willing to give. Donations will be accepted at our meetings or via paypal at babyweartulsa@gmail.com.


What's the cost of membership to the LL?  For BWAT we have a yearly membership cost of $20.  If the carrier is damaged or not returned while it is in the member's possession it is the member's responsibility to replace it monetarily (that's the small print :)). To ensure the ability to charge the member for the replacement or repairs cost we hold either a signed credit card slip or a signed blank check in a lockbox that is only accessible by two leaders; the Librarian and the Treasurer.  All damages and costs will be discussed with you prior to charging you.  However if you fail to communicate in a timely manner you will be charged.

So I'd like to try x carrier, how do I go about checking it out?  BWAT has a large LL however it's also popular.  Some carriers are checked out every chance and others go months between check outs.  To simplify the process for our Librarian we have a digital wait list.  You do not need to be a member before signing up for the wait list.  You can only check one carrier out at a time.  Prior to our monthly meeting Tiffany will tag all members that are up for a carrier (and which carrier).  If you can not make the meeting then the carrier will go to the next person on the list that isn't up for a different carrier.  Yes this means that at times the ninth person gets the carrier.  After 11:30 am at our Saturday meeting the LL carriers that have not been picked up become available to check out to the members at the meeting.  This happens a lot!


So when can I check out a carrier, when is it due, what if I can't make it to the Saturday meeting?  Check outs occur at the monthly meeting as well as our mid-month meeting only.  Most carriers are due back by the next monthly meeting (if you can not return the carrier by the start of the meeting then it needs to be returned to a leader BEFORE the meeting).  Late fees accrue for late (even if it's during the meeting) carriers.  BWAT requires and needs the carriers for members and non members to try on during the meetings so this is important!  No carriers can be checked out before the meeting for this reason.  However if you can't make the Saturday meeting you can see if a carrier you want has been returned or not checked out at the mid month meeting or contact Tiffany about picking up a non checked out carrier from her in between meetings.  Some carriers are on two week checkouts which means they need to be returned at the mid-month meeting.  

So where is the wait list? It can be found here:  http://bit.ly/1r2Vdfz
or if you are mobile: 
http://bit.ly/ZrSZMm

Now I'm on the wait list and I've been tagged, how do I pay my membership fee?  You can pay by cash, check, or card (for a small processing fee) at the meetings.  You can also PayPal the $20 gifted (friends and family) to babyweartulsa@gmail.com prior to the meeting.
Link to pay for membership via PayPal:


Okay so I'm now a member and this will be my first meeting, what can I expect?  First you'll sign in at the meeting and attend BWing 101 (if you arrive in time).  Next you'll visit the stations and play with the carriers.  You'll fill out our Lending Library Form (for every check out) and turn it in.  You will be verified for a current paid membership as well as a "deposit" on file.  At 11:25am carriers are released to be picked up and a leader or volunteer will check to make sure you are leaving with the correct carrier.  If you need to pay your membership fee or submit a "deposit" a leader will be available to assist you at the meeting.

If you would like to print and fill out the forms to bring they can be found here: http://bit.ly/1o6xMO0 and http://bit.ly/1sw3mpq

Have other questions?  Feel free to post in group.  


Happy Babywearing!


C.J. North is the Babywearing Around Tulsa Treasurer.  She is a Babywearing Institute Scholar working on certification.  C.J. stays home with her 3 kids and manages the allergy and special needs of her family while being overly addicted to research.  In her rare spare time she enjoys crafting, reading, photography, and playing video games.

Wednesday, March 19, 2014

How To Break In a Woven Wrap

There are many, many ways to break in a woven wrap and every time you ask the question in a large babywearing group you are going to get 100 different answers.  It does seem that the general consensus is that the absolute BEST was to break in a woven wrap is to use it.  The more you use it, the faster it will break in.

But what if you don't have that kind of patience?  What if it is just too darn stiff and you wanted it to soften up RIGHT NOW?  Well there are many things you can do to speed up the breaking in process.

Wash it.  Be sure to follow care instructions for the fiber content of your wrap, but if its safe to do so, wash it and tumble dry on low.

Dryer Balls.  Add a bunch of bouncing wool balls to the drying portion of above or throw the wrap in dry and toss in a damp towel.  The more dryer balls the better they work.

Braid It.  Ok, so its not what you usually think of as a braid with 3 seperate peices.  It is more like what is often reffered to as a daisy chain.  Learn how to do it here.
 
New to braiding?  Check out this you tube vid: https://www.youtube.com/watch?v=fuXlCdLiTpU
 
 
Donut.  Like the braid, the donut uses friction of the wrap against itself as well as the pulling and tugging and manipulating of the wrap to break it in.


Never made a wrap donut?  Never fear, you can get help here:  https://www.youtube.com/watch?v=CHpu0JnezDY


Sit on it.  Just fold it up and sit on it.  Or sit on it braided.  Or sit on it as a donut.  If folded, unfold and refold often. 


Sleep with it.  For reals. 

Knot Pulling. Also called knot dragging.  See how here: http://www.youtube.com/watch?v=xs2IYwzoQfY

Let the baby play with it.  They know it's important to you so they will want to drag it around and play with it if you let them. Or sleep on it or roll around in it or use it as a blanket.

Hammock.  Always fun, you can make a hammock or swing out of your wrap for your little one to lay in.


Run it through crib rails.  Or chair slats.  Run it back and forth through multiple if you can.  Make sure they are smooth and unlikely to snag your wrap.

Iron it.  As long as it is ok for your fiber content, ironing will help break in your wrap and have the added bonus of making it look pretty.


Somer Johnson is a Babywearing enthusiast and Momma to E, a bundle of energy. She is a Babywearing Institue Scholar working towards her certification.  She is also addicted to cloth diapers and makes and sells wool dryer balls as SomerKnits. Occasionally she also carves out some time to knit, spin or weave - her main pre-baby passions.
 

Tuesday, December 10, 2013

Carry of the Week - Torso Carry Love

Carry of the Week - Torso Love!


Ok, i’m going to be honest - I did NOT want to do this post. Torso Carries were requested, talked about it, videos linked, promises made. But I didn’t want to do it. The primary reason is I have no core strength. Zero. I’ve alluded to my “back problems” in our group but the fact of the matter is, I have much more than “problems”. A five level spinal fusion to help correct scoliosis when I was 16, with 3 levels collapsing during the pregnancy with my first son, have left me with virtually no core stability. I babywear because I HAVE to (I also love it - so that’s a plus!). Slings are literally the only way I can carry my babies for more than a few feet at a time. So the prospect of putting all that weight solely on my midsection scared me to death. BUT, I love you ladies. So I delved in. And here is what I found: It isn’t that bad! I still prefer to distribute the weight as much as possible but a torso carry was definitely doable. Even for an extended period of time! And Solomon LOVED the freedom of having his upper body free. I almost felt like I wasn’t wearing him because I had so much freedom of movement. And let me tell you, if you have any neck or shoulder problems you are going to love me after this post! :)


When I started researching Torso carries I found that it is basically one carry, used primarily in African cultures, that uses a towel or short piece of cloth to wrap a baby on your back. It honestly is a LOT like wrapping up with a towel - they use the same top rail flip over and it goes under your arms the same. It was very familiar. But I was able to look further and come up with a few far more secure feeling carries. So I am going to show you several methods to Torso carry so you can pick what is best for you. Here is the first video with the “towel” method (I did this with a size 4 gears and tied under bum): http://www.youtube.com/watch?v=rQ6h64S-oto


The first method is a front Torso Carry that is based off a Front Wrap Cross Carry.  The idea here, is after you have baby secured in the torso pass you bring (carefully) both shoulder straps under your arms. You still cross over baby, pass under legs and tie in back. I would say this would work best with smaller babies as toddlers can easily lean back in this one. Be aware, this carry is lower on your body so make sure you are always aware of babe’s neck and face and be familiar with babywearing safety (make sure their chin is never on their chest, etc). The good thing about this carry is you could use a size up or down from your base size and make it work (basically sizes 4-7).  The key to keeping this one comfortable is TIGHTNESS. Always start with your bottom and top rails and don’t forget to tighten the middle as well.
Here is the video Tutorial: http://www.youtube.com/watch?v=iyfwI46s7Wk


The next method is a back torso carry and is based on a double hammock. This is best for older babies because they need to have really good head and neck control to be on your back without the support of a wrap higher up around them. This carry is done with your base size or a size up (usually a 6 or 7). You start this carry like the traditional double hammock (refer back to our earlier blog post on a DH), and when you get to the cheerleader Y pull, you bring both passes under your arms and tie in a knot at your chest (you can see this in my picture). I used my base size so brought my ends back around and tied under bum. If you are sized up you can cross over and under babies legs and tie in front. Whatever is most comfortable for you and what size you have. Here is the Video Tutorial: http://www.youtube.com/watch?v=Ny_jR0DDKhE


There is a similar Torso Carry to the one above done with a shortie (size 3 or 4). It is similar to the DH variant above, but ends with the chest tie. I did this with our size 3 Cheetah and wrapped the tails back under the wrap. Here is the video: http://www.youtube.com/watch?v=uwum3eybbl8


Finally, we have a Torso carry using a Ring Sling! This is starts out just like a back carry in a ring sling (get baby in the sling then scoot them on to your back) but you slip your arm out before doing the final tighten. Here is the video: http://www.youtube.com/watch?v=qZ_qhMfysEU


OK! I think the Torso Carry compendium is complete! I hope you guys find one of these variations you like and PLEASE post pictures in the group! I love to see people trying a new carry because I suggested it - just makes my day! And, as always, if you have a suggestion or request for the next CotW please let me know and guest writers are ALWAYS welcome.


Tiffany Johnson is a breastfeeding, baby wearing, co-sleeping, attachment parenting mama to three beautiful children. She is currently taking a leave of absence from her busy career as an estate planning attorney to focus on her home and family. In her spare time she loves crafting, reading a good book, red wine, all things geeky, and loving on her babies.

Monday, November 25, 2013

Carry of the Week - Wiggleproof Back Carry (WP)


A few weeks ago I realized we had a problem - a big one. Solomon discovered he could dig his toes into my hips and stand-up while in a back carry...Apparently, this is the most fun thing an almost 8-month-old baby could imagine because he literally did it within 5 minutes of any carry for an entire week solid. My old stand-by rebozo carries were out the window! On to the ruck. Surely this little monster couldn’t unruck himself, right? Wrong! He discovered that once firmly standing on my hip bones, a couple of good bounces would unseat the deepest of seats. And pop he did. I tried putting the bottom rail in his pants waistband. I made double sure he was beyond knee-to-knee and lots of fabric between us. But, alas. The trick could not be unlearned and I fully came to understand the terror in the term “seat-popper.”


On to find new carries I went! Now, everyone should know by now that I HATE a chest pass. There is a very good reason for this but one which is a bit too personal for an internet blog post. But, suffice it to say, I am more amply endowed than is comfortable with a chest pass. So I had to find unpoppable carries that DIDN’T involve chest passes. Double Hammock was out. I posted on the FB group page of my woe’s and C.J. came to my rescue! She suggested the wiggleproof back carry (which I naively thought was the same as a norwegian wiggleproof back carry - it isn’t). Several youtube videos later, I had a new carry to practice. Now, I will say this carry was a bit harder for me to get down than others I have tried. But it is definitely worth the patience and persistence. It is a heavy-duty multi pass carry that can finish in several ways, forbids seat-poppage, keeps LO warm and contained, and DOES NOT involve a chest pass!


The wiggleproof is true to its name and prevents even the most determined of babes from escaping. This carry is essentially a basic rucksack with two additional back passes for reinforcement. This carry is done with a longer wrap, such as a size 6 or 7. This carry also has double ruckstraps over your shoulders so is best done with a thinner wrap. If the wrap is too thick it will be difficult to move your arms and to even keep the fabric in place. I find a 100% cotton wrap to be best for me in this carry.


Basic steps:
1 - Get baby on your back with the middle marker in the center of LO’s back and make a seat;
2 - Take one side and hold between your knees while sandwiching the shoulder of the other side so that both rails are towards your neck and the fold is on the outside of your shoulder;
3 - At your armpit level, put one twist in the tail and bunch the fabric bringing it under your arm, behind you and up between LO’s legs;
4 - Grab your top rail between LO’s legs and bring up in a diagonal across their body and over your opposite shoulder;
5 - Both tails are over your shoulders;
6 - Switch sides and repeat the above steps with your long tail (twist and bunch, bring up between LO’s legs, spread to knee and cross on a diagonal);
7 - Both tails are again over your shoulders;
8 - Take both tails and tie a half knot at your collar bone;
9 - Bring your rails around over baby’s legs and tie under bum.
* If your wrap is not long enough, you can skip the knot tie and simply take the straps back around under your arms, over baby’s legs, and tie under bum. You can also skip bringing the wrap around again and tie in front tibetan style.


Picture Demonstration: http://www.thebabywearer.com/forum/showthread.php?112898-Wiggle-Proof-Back-Carry-Photo-Instructions* (This is on the Baby Wearer forum so you must have an account to be able to see the pictures)


Video Demonstration with candy-cane chest belt finish variation: http://www.youtube.com/watch?v=zoTKVJ8HKEw


If you have a seat-popping, leg-straightening, wiggley wrappee this is definitely a carry to try! Please let me know if you have any carry requests and I will get them worked in!


Tiffany Johnson is a breastfeeding, baby wearing, co-sleeping, attachment parenting mama to three beautiful children. She is currently taking a leave of absence from her busy career as an estate planning attorney to focus on her home and family. In her spare time she loves crafting, reading a good book, red wine, all things geeky, and loving on her babies.

Monday, November 11, 2013

CotW - Kinderpack Hip Carry

Changing up Carry of the Week a little bit, here is one for you SSC lovers!  Give this quick hip carry a try, you may discover whole new worlds with your beloved SSC or develop a new found appreciation of SSCs in general.  Without further ado, CotW!
 
Hello. My name is Heather and I am a Kinderpack addict. This love was further cemented on Friday at Gilcrease Museum’s Museum Babies program. Had the dude comfortably riding on my back only to learn the museum prefers babies worn in front or hip carries (seems some curious backriding babes were grabbing at priceless art……oops!). Having successfully hip carried numerous times with the Ergo, decided to do the same with my Kinderpack. Worked like a charm and very easy to do!

First unsnap all buckles, slide buckles to maximum length, and push the Perfect Fit Adjusters (PFAS) as close to the buckles as possible.
 
Next, ignore the smattering of toys on the floor and place the Kinderpack around your waist to accommodate a hip carry. Snap the front shoulder strap into back buckle to create a sling. Slide the sling over your head. This makes the seat for baby.


 Insert baby into the carrier. Bring the back shoulder strap around your waist and snap it into the front buckle. Tighten until baby feels secured.


Slide the front, diagonal strap onto your shoulder. Snap the PFAS behind you for additional support and to keep the front, diagonal strap from applying unnecessary neck pressure. Initially, do not be surprised if assistance is needed to buckle the PFAS. It helps to have them out and accessible before you put baby in the carrier. Tighten the front, diagonal shoulder strap as needed.


Voila! You are now successfully hip carrying in the Kinderpack. Happy Babywearing!


**Side note - this hip carry can also be done in any SSC where the straps unbuckle.  That includes Ergos and others.


Heather Langley is an avid babywearer and proud mom to Rex, age 19 months. She is a Babywearing Around Tulsa administrator and Employment Specialist at Family & Children's Services Women in Recovery program. Heather enjoys spreading the babywearing love, music, reading, and spending time with her friends and family.

Monday, October 28, 2013

Carry of the Week - Front Cross Carry (FCC)


This week we are going to visit a staple that should be in every babywearers handbook, the Front Cross Carry. This is my absolute favorite front carry and one I recommend every new babywearer learn. This is one of the few “poppable carries”- you can pre-tie this carry and put baby in and take them out without re-tieing! This is great for squishy babies when you have a lot of changing diapers, etc. going on. This is also a fabulous carry for a nervous public wrapper! Pre-tie at home and pop baby in when you get to your destination! I used this carry for every preschool drop-off for the first 4 months of my LO’s life.
 
 
We started this series with the Front Wrap Cross Carry (FWCC) and this is very similar so if you did that carry with us you won’t have any trouble picking this one up - this carry doesn’t have the vertical torso pass. This carry is also a great nursing carry. This carry can be done with your base size wrap on up. So my base size is a 5 and I can do this carry with a 5, 6 or 7.


You start this carry with a pre-tie:
1 - Bunch the middle marker at the center of your back;
2 - Bring both tail in front of you and cross the as you bring them over your shoulders;
3 - I like to put my arms inside the crosses and pull out just a bit to make sure there is room for my LO;
4 - Cross again in the back and bring the tails around to tail in front at your waist.
5 - You will essentially have a torso pass across your back with an X in the front and and
X in the back with the ends tied at your belly botton.


After you get a pre-tie you can insert your baby as follows:
1 - Find your inside pass, the X that is nearest to your body and put you baby against the
OPPOSITE shoulder
2 - Lower baby into the X with one leg going into the closer X
3 - Switch baby to the opposite shoulder and insert their other leg into the other side of
the X
4 - Lower baby to sit in the bottom of the X and adjust both sides to fit knee to knee
starting with the inside pass
5 - I like to untie my tie and bounce up a bit while pulling down to tighten my wrap (you
can also go strand by strand to tighten while holding the opposite rail between your
knees)
6 - Tie under baby’s bottom in a double knot.
You can remove the baby from the wrap without un-tieing by doing the above only backwards: Raise baby up towards opposite shoulder of inside pass and remove the first leg and then switch to the opposite shoulder to pull the baby all the way out.


One of the best things about this carry is how easy it is to discreetly nurse in. Here is a video demonstrating that: http://www.youtube.com/watch?v=SMrng7kp0gE
If you find your wrap is a bit on the short side to tie in front, here is a knotless varriation that you can try: http://www.youtube.com/watch?v=aVwuTpp-N-o
   
As always, please post your pictures on the Facebook page as well as any tips, suggestions, or struggles. If you have a problem you want a carry solution for, please let me know! I love to create posts by request.


Tiffany Johnson is a breastfeeding, baby wearing, co-sleeping, attachment parenting mama to three beautiful children. She is currently taking a leave of absence from her busy career as an estate planning attorney to focus on her home and family. In her spare time she loves crafting, reading a good book, red wine, all things geeky, and loving on her babies.