Showing posts with label back carry. Show all posts

Monday, May 18, 2015

Why I love Babywearing


I knew that I was going to wear my first baby before she was even born. As a first time

mom, I had a lot of time on my hands to scour the internet for all things baby. I read a

multitude of articles on parenting styles, feeding, diapering, finding the perfect name,
and *babywearing*.

I didn’t know much about babywearing other than the claim from a friend that it would
make my life with a newborn much easier. In the list of
must-haves for baby to be was the Moby.

I got the olive Moby. I loved it. It was such a wonderful
feeling snuggling my newborn daughter so close. A few
times I even got my husband to wear our baby girl
*swoon*. I loved having her close. I wore her to the fair,
the zoo, the park, and even in a cave.


Unfortunately, the Moby soon became a tad
uncomfortable due to my rapidly growing baby and it’s
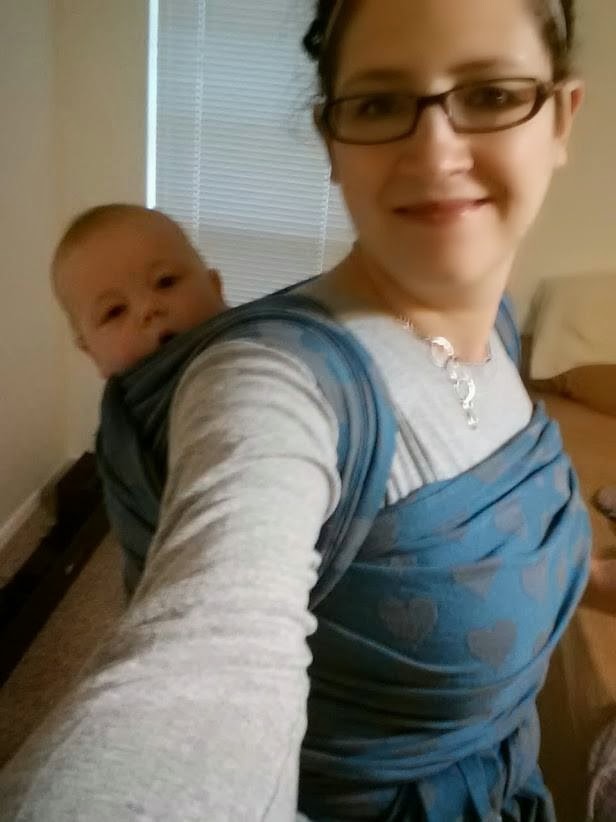
tendency to be quite stretchy, so I invested in an Ergo.
The grey galaxy ergo, to be exact. This was the
beginning of my babywearing adventure. I fell down the
rabbit hole and I have yet to find my way out. I’m on my 3rd baby, I’ve owned *dozens*
of carriers, it’s an obsession. I love every bit of it. The obsession is not a necessary part
of babywearing. ;-)


So, your friend keeps telling you that you *need* to wear your baby. You like the idea,
but you’re not really sure if it’s for you. You wonder if it will really be all that comfortable.
Can the baby breathe in there? Is it expensive? Will it really get that much use? You’re
on the fence and not sure if you’re ready to take the plunge.

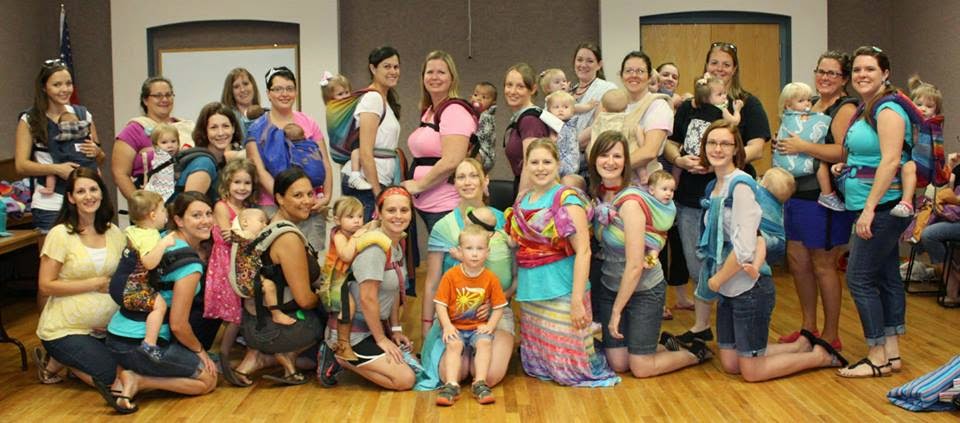
I get it. Parenting is full of choices, some much more trivial than others. So, I surveyed
some moms, dads, grandmas, sisters, etc and asked them why they wear their babies.
My hope is that their experiences will shed some light for you and help you to make a
more informed decision. :-)

That’s a half-truth. My hope is that their experiences will convince you that you *must*
babywear! #wearallthebabies

“Babywearing makes my life easier because I can keepmy baby happy with snuggles while getting things done!”
-Jade

“I made an army of 6 children that will overrun my house and cause utter chaos in public if I didn't have some way to contain them. Oh, and the bond, you know, because babies love to be glued to their caretaker/food source.”
-Laci


“I have 5 young children. If it were not for babywearing, I would have a hard time getting things done and I would miss out on lots of snuggles….Whether you have one child or a whole bunch, babywearing can literally be life changing.” -Ashlee


“I baby wear because I refuse to leave the house without makeup on, because I like to cook
dinner every night, and because my girl ADORES being worn. Anything that keeps baby and
mom close to each other's hearts is a win in my book!” -Shelby


“Couldn't do photography without my baby pack” -Gerry


“I love that she holds and hugs me while I'm wearing her.” -Manda


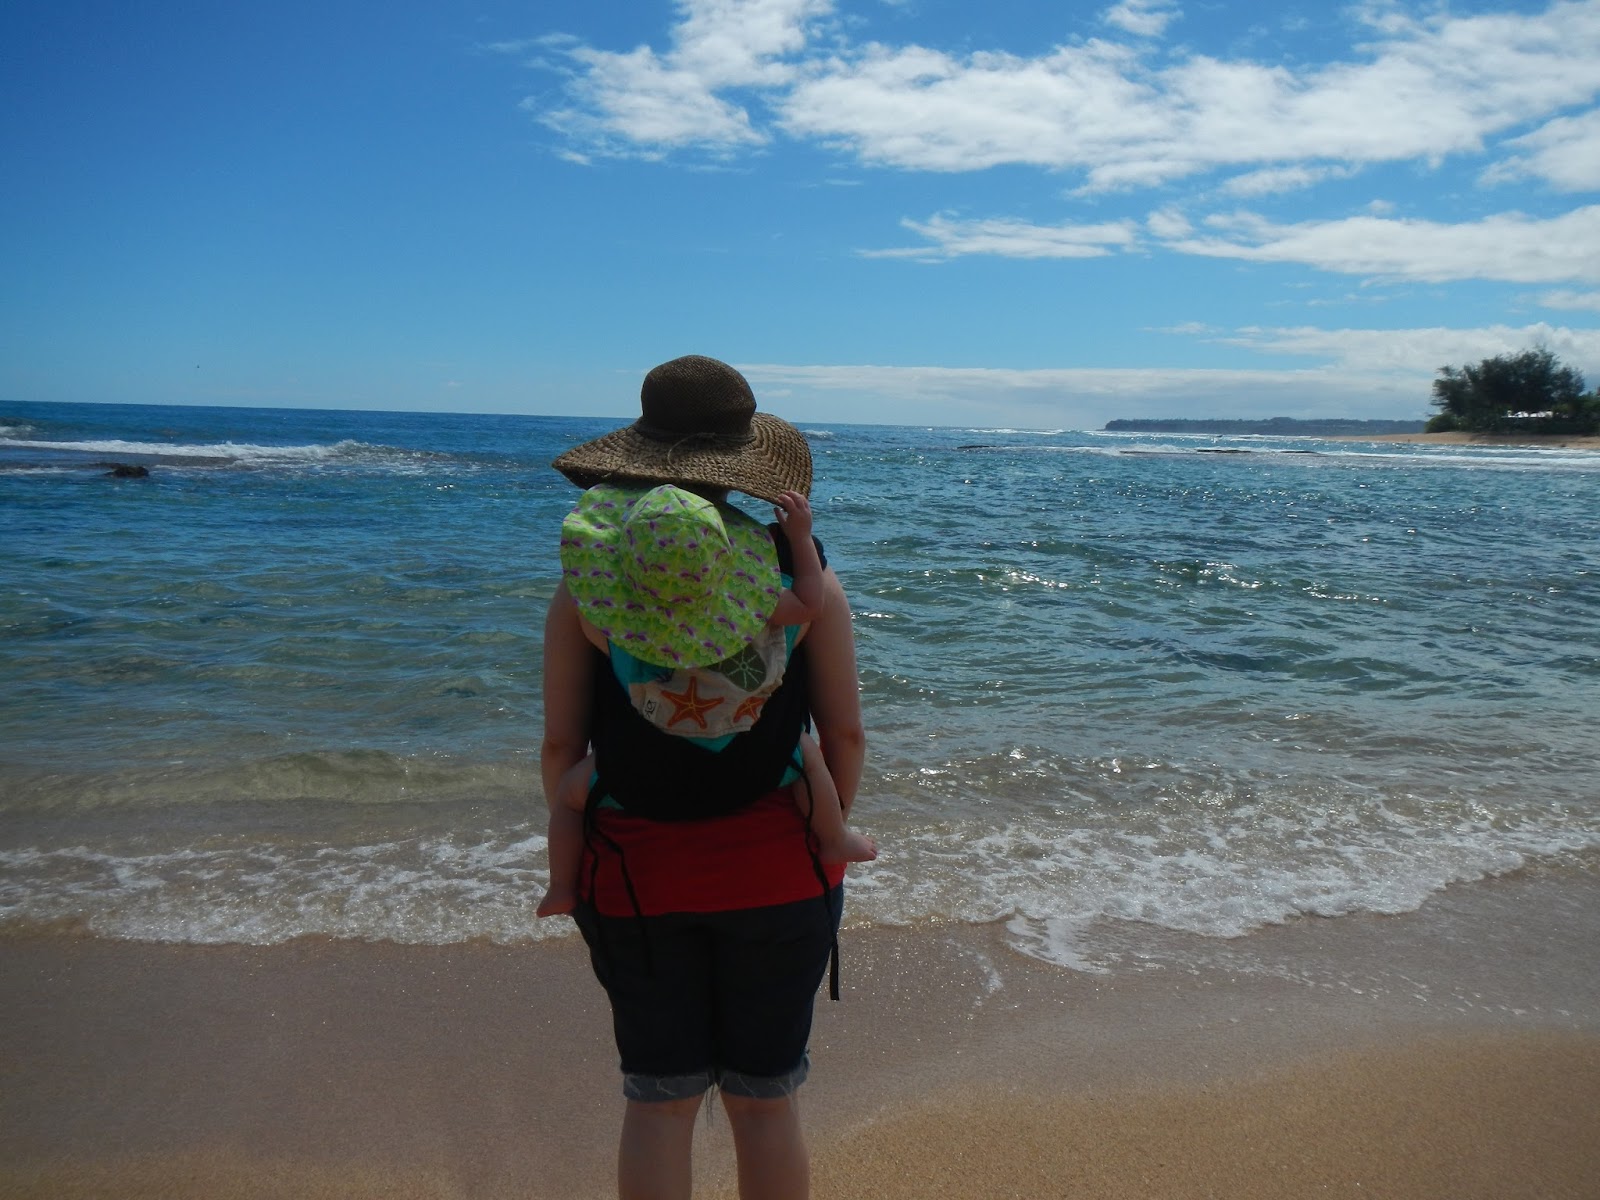
“We are still able to do things like hike and sight see when traveling, just as if we didn't have babes -- because they're along for the ride. It's just what makes the most sense for our family.” -Madison


“It's a way to instantly soothe cranky babies and children. They love to be snuggled up to Mama, and I can get things done at the same time.” -Kristin


“I love being heart to heart with my littles, I love having my babies snuggled into me, breathing in sync with each other and just being… it creates this world in which parent and child can be utterly close and hearts overflowing in any situation.” -Jen


“I missed the hands free fun and interaction with my 3 year old, like playing at the park or just exploring. It's so convenient to be able to do the things he loves without tired arms or wrestling with a stroller. It helps me give them both the attention they need at the same time.” -Chelsea


“I started because I'm cheap. I hate big bulky bucket seats, and wanted the price tag of the convertible. Without a car seat, I knew I needed a carrier. That's when I found a mei tei for $9. It was just what I needed. Once baby came, I found out how calm he was snuggled close to me. I found how nice it was to snuggle his tiny head. I found freedom to move and grow stronger as I carried him. I have found my way to raise my baby, and it's right next to me.” -Lori


“I travel for work and I have used baby wearing in assisting to keep a close relationship with my son.” -Ryan


“It keeps baby happy and helps with my ppd. I love all the different kinds of carriers and how you can always find something to love… It's an amazing experience and when you get a new carrier or learn a new way to wrap you feel like a superhero.” -Kelly


“I have 3 kids and I need to carry the baby so I can hold hands with the older children. It's all about safety and convenience for me.” -Ashley


“I have 5 kids (7,4,3,22 months, & 6 months). It makes it easier when we go out and it's also easier when I am doing things around the house and my son wants to be held.” -Rebecca


“I wanted to hold my baby all day and found a way to do that.” -Lauren


"Baby wearing made my life easier whenmy second baby came and I really got into it and I was able to chase a toddler, nurse, and hold my newborn all at the same time! -Corie


“I am particular on who gets to hold my baby, and babywearing tends to keeps others hands off. Also, carseats get heavy and strollers are a pain. I love the bonding and the cuddling. I was mostly afraid of the price for a carrier. I wasn't sure I would get my money's worth out of it or even use it at all. Now that I have one, I use it everyday! It's a life saver!” -Chelsea


For all you need to know about baby wearing and more check out the rest of the blog. You’ll find reviews, different styles of carrying, safety information, and more. :-)


Jessica Eubanks is a chaser of toddlers, a wearer of babies, and a lover of her husband.

Monday, February 2, 2015

Growth

WARNING:  Sappy post to follow.

I thought about taking this back to the beginning.  Back to when we had a half dozen people per meeting and a dozen was a really big day.  Back to when we didn't have the giant lending library we have now so each mama who came brought every carrier they owned, whether it was 1 or 10, and dumped them all out on the tables in the room for everyone else to try.  Back when there was room to spread out a blanket on the floor and plop all the kiddos on it.  But that was way too many pictures and I still want the post to be able to load on your computer.  ;-)

My how we have grown.  Even though everything in the intro paragraph may sound wonderful and perfect and ideal to some people -- and it was a wonderful and perfect beginning to Babywearing Around Tulsa -- what we have grown into is AMAZING.  

We have tried new things and made new friends.  We have fund raised and saved dues money and searched hard for good deals.  We have grown an impressive lending library and we shared our message with so, so many parents and caregivers.


We have lived through carrier fads.  ;-) We have worked through different meeting structures and teaching techniques.  We have LOVED getting together every month.

We don't always remember to take a group photo, but when we do they are always an awesome mix of moms, dads, grandparents and babies.  The mix of carriers is always amazing.  

We love that in BWAT wrappers, SSC lovers, Mei Tai enthusiasts and ring sling fanatics can coexist and do so lovingly.  And that its very hard to get a group photo where no one is talking, because everyone loves to talk to each other so much we just can't stop.  

If you want to learn to wear your baby, you are welcome here.  If you have your one beloved wrap and need no other carrier, you are welcome here.  If you want to collect all the pretty SSCs you can get your hands on, you are welcome here.  If you want to learn to carry your newborn, you are welcome here.  If you want to try a preschool size KP for your big kid, you are welcome here (and we have one in the lending library).


Twins, singletons, front carries, back carries, fancy finishes, ring slings, stretchy wraps.....  We work with you to find the perfect carrier for you and your baby.  One of the things that makes BWAT so special is that we know there isn't a one size fits all solution to babywearing and we celebrate our diversity.

The support that this group has provided to so many is invaluable.  I hope I can get to know each and every one of you.  At our current size, I know its virtually impossible, but please know that I value every one of you anyway.   (3000 facebook members, guys!  We have OVER 3000 facebook members.  Can you believe that?  My mind is blown.)

The friendships that have been forged here are strong and deep.  Together we have learned so much and continue to do so.  


Together we grow.


Somer Johnson is a Babywearing enthusiast and Momma to E, a bundle of energy. She is a Babywearing Institue Certified Babywearing Educator.  She is also addicted to cloth diapers and makes and sells wool dryer balls as SomerKnits. Occasionally she also carves out some time to knit, spin or weave - her main pre-baby passions.

Tuesday, September 16, 2014

My Wrapping Journey


I’m a wrapper!!! I’ve wanted to say that for so long and now I can.


One year ago when my second daughter was born I entered into the wonderful world of babywearing. I had an Ergo which is a great carrier, but was determined to master wrapping.  I mean how hard could it be? All those mamas on YouTube made it look so easy. Making a seat in one graceful movement, perfect gliding passes…yeah not so much. I was having the hardest time figuring out all of the different carries. You should have seen us after trying our first back carry. There were definitely tears.  My daughter was crying too. She was super wiggly, I couldn’t get a good seat and passes would not pull tight.  (Don’t worry. I always practiced over a bed as any new wrapper should).  I don’t know exactly what it was. Maybe it was just my stubborn nature.  But every time I said I was going to quit something always brought me back to practice again.When my daughter was about 6 months old and after watching countless YouTube tutorials, I finally learned how to get her up on my back safely. A couple months after that I could get her up on my back fairly easily. I was even getting pretty decent at spreading passes. However, it still was not completely comfortable to me or my daughter and definitely not my first choice of carrier. I would still reach for a buckle carrier first. Not that there is anything wrong whatsoever with a buckle carrier. But I wanted to like wrapping. Correction, I wanted to LOVE wrapping.


I don’t know when it happened exactly.  But one day I was wrapping and it just worked. It felt right. After all those months of practice, tears and sweat, it just clicked and I wrapped my almost one year old with ease.  Then it happened again! And before I knew it I started choosing wraps over buckle carriers. It was even super comfy.  I was a wrapper!!! It may have taken almost twelve months but it happened!


Now, I am not writing this to, flaunt my “wrapping skills” or anything like that. I’m writing to encourage every person out there who wants so badly to wrap but feels that they just can’t.  Who wants to so badly to do a back carry but just can’t make a seat or tighten those rails. Who thinks that if he/she can’t master wrapping in a couple months they must be a failure. You are not a failure. You are learning a new skill and it takes time.


Here are a few tips I have gathered over the year that can really help the wrapping journey.


1.       Find a babywearing group. If you don’t have one in your area, at least join one on Facebook. They are an endless fountain of support and knowledge. I am eternally grateful for my group Babywearing Around Tulsa. I could not have made it this far without the lovely women I met in that group.


2.       Don’t give up after a couple tries. Be patient.  It may take some people longer than others but with time you can do it. Don’t hold yourself to a time table.


3.       If possible try a few different wraps.  Different blends, weaves and thickness can make all the difference in a wrap job.  Now I understand I’m not made of money either.  That’s why I became a compulsive churner.  I have rarely owned more than one wrap at a time. With being able to trade or sell what I currently had I have been able to try a bunch.


4.       Don’t make the mistake I did and try back carries before you have mastered front carries. There are things you learn when front carrying that are essential to back carrying. Believe me. You will save yourself a lot of trouble.


5.       Lastly, don’t lose sight of what babywearing is about.  Don’t let the desire of obtaining a skill make you lose out on the bonding experience between you and your baby.  If you are getting frustrated, take a break. Carry your baby how you know best. Kiss their head and breathe them in.  After a few days or weeks try again.


I hope my ramblings have helped a little. I wish you all the best in your own babywearing journeys.

Blessings and happy babywearing

Megan


Megan Kloker is a God-loving, babywearing, cloth diapering, health nut who loves being a stay-at-home mom to her three children (Aiden, Nyah and Lena) and wife to her husband (Grant). She, grew up in Leona Valley California with her 10 younger siblings before she got married and moved to Springfield Illinois. Megan and family have since lived in Tulsa Oklahoma and have rencently moved to Fort Worth Texas. Megan loves being around people, drinking coffee and playing Dance Central.

Monday, November 25, 2013

Carry of the Week - Wiggleproof Back Carry (WP)


A few weeks ago I realized we had a problem - a big one. Solomon discovered he could dig his toes into my hips and stand-up while in a back carry...Apparently, this is the most fun thing an almost 8-month-old baby could imagine because he literally did it within 5 minutes of any carry for an entire week solid. My old stand-by rebozo carries were out the window! On to the ruck. Surely this little monster couldn’t unruck himself, right? Wrong! He discovered that once firmly standing on my hip bones, a couple of good bounces would unseat the deepest of seats. And pop he did. I tried putting the bottom rail in his pants waistband. I made double sure he was beyond knee-to-knee and lots of fabric between us. But, alas. The trick could not be unlearned and I fully came to understand the terror in the term “seat-popper.”


On to find new carries I went! Now, everyone should know by now that I HATE a chest pass. There is a very good reason for this but one which is a bit too personal for an internet blog post. But, suffice it to say, I am more amply endowed than is comfortable with a chest pass. So I had to find unpoppable carries that DIDN’T involve chest passes. Double Hammock was out. I posted on the FB group page of my woe’s and C.J. came to my rescue! She suggested the wiggleproof back carry (which I naively thought was the same as a norwegian wiggleproof back carry - it isn’t). Several youtube videos later, I had a new carry to practice. Now, I will say this carry was a bit harder for me to get down than others I have tried. But it is definitely worth the patience and persistence. It is a heavy-duty multi pass carry that can finish in several ways, forbids seat-poppage, keeps LO warm and contained, and DOES NOT involve a chest pass!


The wiggleproof is true to its name and prevents even the most determined of babes from escaping. This carry is essentially a basic rucksack with two additional back passes for reinforcement. This carry is done with a longer wrap, such as a size 6 or 7. This carry also has double ruckstraps over your shoulders so is best done with a thinner wrap. If the wrap is too thick it will be difficult to move your arms and to even keep the fabric in place. I find a 100% cotton wrap to be best for me in this carry.


Basic steps:
1 - Get baby on your back with the middle marker in the center of LO’s back and make a seat;
2 - Take one side and hold between your knees while sandwiching the shoulder of the other side so that both rails are towards your neck and the fold is on the outside of your shoulder;
3 - At your armpit level, put one twist in the tail and bunch the fabric bringing it under your arm, behind you and up between LO’s legs;
4 - Grab your top rail between LO’s legs and bring up in a diagonal across their body and over your opposite shoulder;
5 - Both tails are over your shoulders;
6 - Switch sides and repeat the above steps with your long tail (twist and bunch, bring up between LO’s legs, spread to knee and cross on a diagonal);
7 - Both tails are again over your shoulders;
8 - Take both tails and tie a half knot at your collar bone;
9 - Bring your rails around over baby’s legs and tie under bum.
* If your wrap is not long enough, you can skip the knot tie and simply take the straps back around under your arms, over baby’s legs, and tie under bum. You can also skip bringing the wrap around again and tie in front tibetan style.


Picture Demonstration: http://www.thebabywearer.com/forum/showthread.php?112898-Wiggle-Proof-Back-Carry-Photo-Instructions* (This is on the Baby Wearer forum so you must have an account to be able to see the pictures)


Video Demonstration with candy-cane chest belt finish variation: http://www.youtube.com/watch?v=zoTKVJ8HKEw


If you have a seat-popping, leg-straightening, wiggley wrappee this is definitely a carry to try! Please let me know if you have any carry requests and I will get them worked in!


Tiffany Johnson is a breastfeeding, baby wearing, co-sleeping, attachment parenting mama to three beautiful children. She is currently taking a leave of absence from her busy career as an estate planning attorney to focus on her home and family. In her spare time she loves crafting, reading a good book, red wine, all things geeky, and loving on her babies.

Wednesday, October 16, 2013

Carry of the Week #5 - Double Hammock (Poppins and Saltwater variations)

There have been some requests for a more advance carry so I thought I would start with a basic double hammock (DH) and spice it up with a couple of finish variations. A double hammock is a secure back carry but it can be a more difficult carry to master because it can be challenging to get the rebozo passes tight enough white trying to keep a chest pass tight. This carry may take a little more effort for those who aren’t as comfortable with a variety of back carries. But I encourage you to try it and for everyone who is ready for the next level, choose one (or both!) of the finish variations to show off!


I also want to point out that a back carry should never be attempted before you are completely comfortable in front carries. I highly suggest seeking the assistance of an instructor before attempting to back carry for the first time but it should always be tried with the help of a spotter and/or over a soft surface (such as a bed) until you are entirely comfortable. It is difficult to gauge how a child is going to react to a back carry (both being wrapped and being taken down) so it is always better to have another set of hands around until you are both very comfortable with the process. This is a great reason to come to a meeting even if you aren’t a new wrapper!

 
The DH, also called Chunei back carry, is a very secure carry because there are two rebozo passes going across your child (like a double hammock!). Remember, a robozo pass has one end going over your shoulder and the other end coming under the opposite arm. This wrap is best done with a size 5-7 woven wrap. The basic steps are:


1 - Start your middle marker at your chest and wrap around to your back; the point your wrap touches the middle of your back is where your new middle marker will be and where you should begin.
2 - Put baby on your back with an off-centered rebozo.
3 - Using the end of the pass going under your arm, spread a torso pass across your chest.
4 - Bring that chest pass around and make a second rebozo pass over the baby, tightening torso pass as you go.
5 - Bring your straps back around and under your arms, bunched or spread reinforcing passes over then under the baby’s legs. and tie off in front. If your wrap is not long enough to tie in front, you can tie under bum (TUB).


Video Tutorial: http://www.youtube.com/watch?v=HYvZNx45isE *Good tips on how to get a tight chest pass!


VARIATION 1 - Poppins Double Hammock (PDH)


This is a DH with the finish inspired by the Poppins hip carry. It is a very pretty variation and great for special occasions, or, if you prefer a one shoulder back carry. You follow the basic double hammock instructions above but instead of bringing your second rebozo pass over your shoulder, you want to bring it under your arm and twist with the tail on the other shoulder to make the “poppins” look. You then wrap around to tie under bum.


Here is a picture of Sol and I’s first attempt at this carry (it’s not perfect!) - We loved how tight and secure it was but how the one-shoulder carry gave him a bit more freedom of movement to one side.


VARIATION 2 - Saltwater Double Hammock (SDH)
This is a double hammock with a very pretty finish but it also helps take pressure of the shoulders so it can be a great variation for those who feel a regular DH is too much strain. Again, you follow the basic steps of a DH but once both your tails are in the Y position over your shoulders you bring them in front, twist at chest pass, wrap the top tail through the chest pass (the bottom tail goes over the chest pass), twist again at the bottom of the chest pass and bring around to tie under bum or, if you have a size 7 wrap, you can go over and under the legs and tie in front.
Video Tutorial - http://www.youtube.com/watch?v=3pWIME2NE2o *at 2:00 mark there is a great tip on how to get a tight rebozo pass using your elbow!


Again, the carries this week are more of the advanced nature but I would love to see some pretty variation pictures. And, please, share any tips or advance, along with those pictures on the facebook page. Everyone’s feedback directly determine next weeks carry, so please let me know what you want to see (or if you want to volunteer to guest post!). I hope you have fun with this carry, I really enjoy having a “special occasion” look I can pull out when needed.


Tiffany Johnson is a breastfeeding, baby wearing, co-sleeping, attachment parenting mama to three beautiful children. She is currently taking a leave of absence from her busy career as an estate planning attorney to focus on her home and family. In her spare time she loves crafting, reading a good book, red wine, all things geeky, and loving on her babies.


Monday, September 16, 2013

Carry of the Week: Jordan’s Back Carry

Before we jump into the carry this week, I thought a general introduction to back carries would be helpful. A lot of people (and babies!) prefer a back carry over a front carry because the baby is able to look around more and see what is going on around him. It is also very helpful for the wearer to have free mobility of both arms. I almost always do a back carry to cook dinner or give my older kids a bath for example.
 
Back carries can be a little intimidating at first, especially for newer wrappers. I generally try to get my LO as high as possible (if I can’t lean my head back and touch the top of his, I re-do), and make sure I have the passes on his back as tight as possible. When I want to just double check on him, I often tickle his feet to feel him wiggle around. It is always best to practice a back carry over a bed, or soft area, and have someone there to spot you the first several times. It can also be helpful to practice in front of a mirror.
 
There are several methods for actually getting your baby on your back, the hip scoot and superman are two favorites. This link shows several methods for getting your child on your back with picture and video tutorials: http://www.wrapyourbaby.com/babyonback.htm
 
Once your baby is on your back, getting a good seat is very important. If my son is wearing pants when I do a back carry, I will often tuck the bottom rail into the top of his pants before I put him on my back to get the seat started. You always want material between the baby and you and the aim is to get the seat from knee to knee. A good seat is probably the most difficult part of back carries and one that takes lots of practice to master. C.J. made a great tutorial for getting a good seat using your teeth, and this is the method I most often use: https://www.facebook.com/video/video.php?v=746420530375

This week we had a request for a multi-pass back carry that would show the design of the wrap as much as possible. In meeting that request the Carry this week is the Jordan’s Back Carry (JBC). This is a slightly more advanced carry but I think if you have experience with a back carry you should be able to master it without any problems. This carry can be done with a size 4, 5, or 6 wrap.
 

Jordan’s Back Carry is basically one rebozo pass (a rebozo pass is one tail going over the wrappers shoulder and the other going under the wrappers arm, on a diagonal. A rebozo pass goes over both of the baby’s legs and stay on the baby’s back), one cross pass, and one torso pass. The steps are:

1 - Centered rebozo pass over baby on wrappers back;
2 - using the end of the pass going under the wrappers arm, flip it back up over the shoulder;
3 - Cross pass over the baby
4 - Take the other tail of the wrap and come under the wrappers arm;
5 - Torso pass over the baby (this will show off the wrap design),
6 - Tie off in front.

 
There are several variations of this carry that add an extra rebozo or cross pass (rebozo passes help with leaning children and cross passes help with leg straighteners). Since this is already a mixed pass carry, it is good for most wiggly babies and an added pass variation can help if your is an exceptional wiggle-worm.


Variation: Chest belt (size up for this) https://www.youtube.com/watch?v=vVpKCThuztU


Variation: Half-Jordan Back Carry can be done with wrap sizes 2, 3, or 4: https://www.youtube.com/watch?v=OcshSFS7HhI


Please post your pictures of the Carry this week and let us know if you have any suggestions for next week’s carry or would like to write the next CoTW blog post!


Tiffany Johnson is a breastfeeding, baby wearing, co-sleeping, attachment parenting mama to three beautiful children. She is currently taking a leave of absence from her busy career as an estate planning attorney to focus on her home and family. In her spare time she loves crafting, reading a good book, red wine, all things geeky, and loving on her babies.